A well crafted blog outline is the roadmap that provides clear direction for your blog post ideas. It serves as your guide to creating great content. And a good outline ensures that your blog posts maintain a seamless flow from beginning to end.
Without a well-defined blog outline, your post may lack structure. This leads to disjointed ideas and hard to follow transitions for your readers.
In this article, we will share ten essential tips to help amateur bloggers like you, craft the perfect outline for your blog posts.
If you incorporate these steps into your writing process, you will master the art of producing high-quality blog posts that your audience will enjoy.
1. Define Blog’s Purpose
Before creating an outline it’s important to have a clear picture of your blog’s purpose. Identify who you are writing for. Get to understand the interests and preferences of your potential readers.
Next decide on the angle your post will take and what you want each reader to come away with.
This will help you tailor your content to meet the expectations of your target audience.
Disclosure: This post may contain affiliate links. It means that if you buy something by clicking a link here I may be paid a small commission. You won’t have to pay anything extra. Thank you for your support
2. Choose Your Approach
Approach your blog topic from from a perspective that is interesting and valuable. Aim toh old your readers’ attention. At the same time, strive to be unique.
For example, if you are starting a travel blog, your goal may be to entice your audience to visit locations you’ve been to. Blog about your own experiences.
3: Brain Dump
Start by asking questions then do reasearch to get the answers. Use a blog outline tool to create a list of the answers that you can use.
Use a keyword research tool to help you identify the topics that resonate most with your potential blog readers

Then start jotting down related ideas based on what questions your blog audience have on their minds.
Focus on the challenges your readers face and address those concerns clearly in your blog outline. (Later you will develop them)
Having this information will give you some good insights into what your audience is actively searching for. Then you can choose intriguing and relevant blog topics.
4. Organize Your Ideas
Now it’s time to transform the chaos of your ideas by organizing them into a logical structure.
A blog post outline generator can help you create a suitable sturcture for your blog post. You will need to fine tune the tools output to suit your own needs.
Group your ideas based on hierachy-their rank.
Connect related topics and subtopics so that they provide a seamless within your blog.
The easiet way may be to group them into locations.
A mind map or some other brainstorming technique is great for helping you visualize your thoughts so you can organize them.
5. Choose Your Blog Post Style
So it’s important to decide which type of blog post you are writing so you can choose the appropriate style. Some popular blog pst syles are: listicle posts, a how-to guides, content hubs, and case studies.
- Listicles: These are popular with readers because that are easy to scan and read. The also provide several options and ideas.
- How to Guides: They offer clear, concise instructions blog readers can follow. Videos and screenshots are great features in these types blog posts
- Case Studies: These types of blog posts highligh success stories. Case studies are great for building trust and credibility. This will motivate your audience to take action.
- Content Hubs: These posts link to a list of related content on your blog. These types of posts are good for organizing your content so you have a well structured blog. The also cement your authority and amy even help inprove your blog ranking.

Pick a style that matches your topic, blog perspective, and your audience’s preferences.
Google is a great free tool to help you decide on the best style for your blog post. Simply visit the first page of Google and and see what’s ranking for that general keyword and how the posts are styled.
6. Blog Post Format
Start with a captivaing healine: Healdines play a critical role in capturing your readers’ attention. A headline that grabs attention will arouse curiosity and make readers want to read more.
Follow up with an engaging introduction: Write a headline that hooks your blog readers. Ensure your introduction sets the tone for the rest of the blog post.
Incorporate relevant keywords: Add keywords and phrases into your headings and subheadings.
Sprinke them through your content to improve search engine optimization (SEO) whixh makes your blog easier to discover.
7. Headings and Subheadings
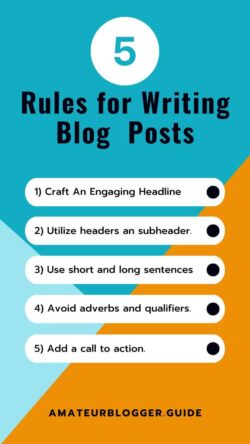
Headings and subheadings help readers to quickly scan and understand the main points of your blog post.
Use a mix of descriptive and employ power words that evoke emotion. For example, instead of a generic heading like: “Benefits of Exercise,” you could say: “Unlocking the Hidden Rewards: How Exercise Transforms Your Mind and Body.”
Start with an intriguing heading. Next, organize your subheadings into a hierarchy, using different levels of headings to give your blog post an attractive layout.
8. Develop Main Points
Once your blog outline is organized and your headings are in place, it’s time to expand on each section and develop supporting points and arguments.
Provide relevant examples, anecdotes, and case studies to make blog readers relate to your content which can bolster engagement.
Divide the main body of your post into sections. Each section needs to focus on a different subtopic or supporting point. Tools such as Hemmingway Editor are great for help you structure your blog post.
Do further research to gather evidence, statistics, and expert opinions to “beef up” your ideas.
Incorporate a mixture of short and long sentences. Employing longer sentences in your writing allows you to provide detailed explanations and expand on complex ideas.
On the other hand, take advantage of short sentences tocreate an impact and convey precise information.
Finally, wrap up your post with a precise and concise conclusion that usually ends with a clear call to action.
They also guide readers through your blog post.
9. Blog Outline Templates
The final step in the outlining process involves refining and polishing your blog outline.
Before you start writing the actual blog post, take the time to review and refine your outline. Ensure that your ideas flow logically from one section to another.
Check for any gaps in information or missing subtopics that your need to be address. This is where blog outline templates may come in handy.
Blog outline templates are guides to help you structure your blog content in a clear, logical way. You can compare your own outline against a pro template to see any ideas or adjustments that may be helpful.
There are many of free blog templates online. You can get free customizable ones from HubSopt and Canva.
10. Refine and Revise
Make necessary revisions and adjustments to create a well-rounded and comprehensive outline.
Consider getting feedback from a trusted colleague or friend who can provide fresh insights and suggestions. Their input may help you identify areas that you may need to expand on or clarify.
Summary

Creating a blog outline is a basic step in the blog writing process. It allows you to structure your ideas and thoughts effectively.
By following these nine steps, you can develop a well-organized and engaging blog post outline that attract and boost engagement.
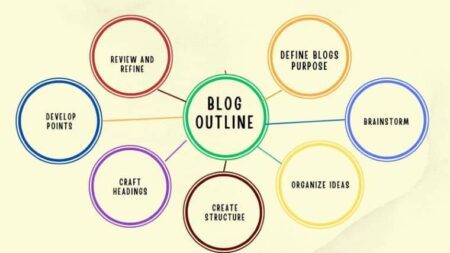
Remember to define your blog’s purpose and audience. Brainstorm, and research relevant topics. Then organize your ideas.
Craft captivating to create headings and subheadings to create a logical and visually appealing structure for your blog post.
And finally develop supporting points, and review, and refine your blog outline using a blog outline template if necessary.
With a well-crafted blog outline in hand, you’ll find that writing an engaging blog post becomes easier.

